A board game designer's web site
Copyright Eric Pietrocupo

E-Mail: ericp[AT]lariennalibrary.com
Material Required
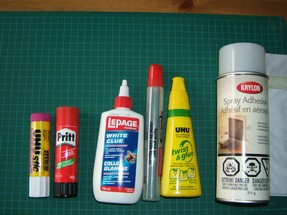
Glues
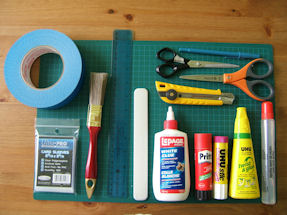 Common Tools
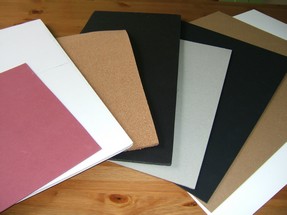 Mounting Material
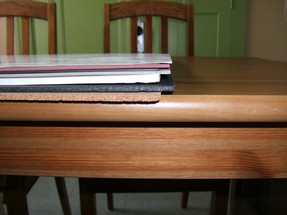 Side view of mounting material
Here is a description of the tools you can use to make your own games. In the pictures you can see the tools I use. There are various way to accomplish the same thing, it depends of what you have and how you like to work. You might also need to check out the board game plastification guide I made since print and play games are generally more fragile games, so you might want to protect them.
Glue : First you can use various kind of glues. The best glue that exist is Planatol white glue which is not shown on the picture (because I don't have any). This glue is non acid, very flexible and used to repair books in libraries. Else there is generally liquid and solid glue. The problem with some glue is that they dry fast, and this is not a good thing because it does not give you the time to work with it. Glue sticks drys really fast and should never be used for a large sheet. Glue stick could be OK if your making individual tokens or other small components. Make sure your fingers don't accumulate any glue because if you touch the printed side of the component, the ink can get stick on your finger. This is generally the case if you did black and white printing.
I had a situation where after gluing stuff it curves. This mostly happens when mounting cardboard. Apparently water based glue would make the material curve unless it is very rigid. The first solution is to mount both sides of the board so that the curve even out itself. The second solution would be to use non-water based glue, which could be messier to clean up, since you might need solvent, or use spray glue.
If you use liquid glue you would probably need a brush to spread the glue all over the components unless it has some sort of applicator. There are other kind of glues like spray glue that some people find very useful but apparently, spray glue dries really fast and it smells. There is also double sided tape which works really well but it's really expensive and hard to find, so you might want to save these for high quality games you want to make. Up to now, double sided tape is the best thing you can get.
Of course, you could print directly on avery 8-1/2x11 labels and stick the print out on the mount material. The problem is that some people said that the glue was very bad, it did not stick well or at least not for a long time period. One of the thing I made with avery labels is that I plastified over the label and there was a border of plastic left all around the label. So it is possible the it is currently the plastic that holds my labels into place right now. So the solution could be to find high quality labels.
Common tool: Like shown in the picture, scissor and Exacto knife are useful for cutting. Some people like round cutters, but personally I hate it. Having a bone folder (the white rectangular thing) could be useful, else you can use a towel to press on what you are gluing. A ruler is always interesting to take measurements especially if you are plastifying your components. Cards sleeve are used to easily protect cards. I generally use very cheap transparent sleeves because I also use these with the bag sealer (see plastification guide). You might also need book plastic to protect your game, look at the plastification guide for more details. Finally, the big roll of what seem to be duck tape is actually high quality non-acid tape used for book repairs. It can be useful for example to stick the back of 2 board together if you want to make a folding board.
Mount Material: Many times, you need to mount what you printed on something. There is various materials that you can use which can either be flexible or hard. Flexible matetial includes Cork and Funfoam. The avantage of these materials is that they are easy to cut and they don't slide on the table. The only issue I had with these material it that it can curve. When you apply glue on cardboard, the cardboard tend to curve. Then when mounted, the cork or fun foam will follow the curve of the cardboard. It might not curve if you were mounting a less rigid material like a piece of paper. In that case the paper is so weak that the Cork or foam will force the sheet to stay in place. Cardboard could be considered semi-flexible material because after gluing, there is also a risk that it curves.
Otherwise there is hard mounting material like thick card board which is on my point of view the best thing you can get but it's a bid hard to find and expensive. You can also use foam core board which is more rigid than fun foam and almost as easy to cut. But if some bad pressure is put at the wrong place and can leave some permanent marks on the board. You can also mount cardboard on another piece of cardboard. It doubles the tickness of the board and can sometime do the good, but again it can curve. I also use cereal box cardboard to mount my stuff. The only problem is that generally the glue holds better on the size which is not printed. So when all your components are printed, you can see the cereal pictures on the back of your components.
Thickness of the material is important according to what you want to do. When making tokens, you generally want something thick since you want players to be able to manipulate them. I have not made tokens with flexible material yet but I doubt that it would be a good idea. Tokens would probably be better a hard surface. If you are making a simple reference sheet, you might not even need to mount it.
<< | Table of contents | Cutting and sleeving Cards >>
Powered by PmWiki and the Sinorca skin